Rina takes you on today’s journey together
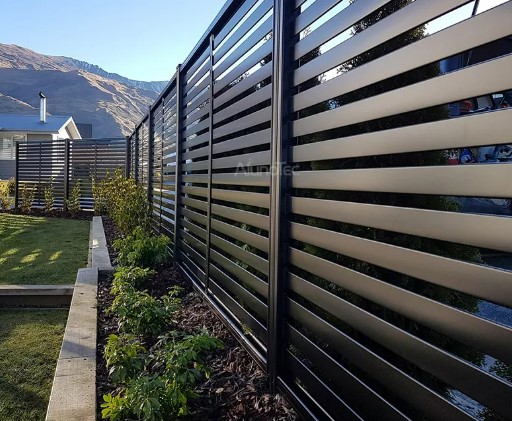
Hey there, fellow DIY enthusiasts! It’s your favorite aluminum aficionado, Rina Meng, back with another exciting blog post. Today, we’re diving headfirst into the wonderful world of installing aluminum fence panels. Now, I know what you’re thinking, “Rina, installing a fence sounds about as fun as watching paint dry.” But fear not, my friends! With my step-by-step guide, a touch of humor, and a sprinkle of pizzazz, we’ll turn this mundane task into a delightful adventure. So grab your tool belt and let’s get started!
Step 1: The Cap-tivating Beginning
First things first, we need to attach those flat caps to the bottom of our aluminum posts. Think of it as giving your posts a stylish hat to wear. Grab four #8 screws for each cap, and let the screwing extravaganza begin! Remember, you’ll need two posts for each panel up to 6 feet wide. If your panel is wider than 6 feet, well, darling, you’ll have to add a fancy center post. Safety first, my friends!
Step 2: The Cover-up Game
Now, before we go all Edward Scissorhands on those aluminum posts, let’s slide in a post cover for each post in the center channel. It’s like dressing up your posts for a glamorous red carpet event. Hold them in place with some tape, and voila! They’re ready for their close-up. Looking fabulous, darlings!
Step 3: The Hole-y Adventure
Time to drill some holes, folks! Grab your trusty 3/4″ metal drill bit and drill two holes on one side of the post. One about 12 inches from the top and another 12 inches from the bottom. Oh, and if your panel is taller than 4 feet, I highly recommend adding a center hole for extra support. Remember, drill between the channels and not on the flat part of the post or the post cover. Safety goggles on, everyone!
Step 4: The Flip Side
Flip that post like a pancake and grab your 3/8″ metal drill bit. We’re drilling the other side of the 3/4″ hole now. Repeat this step for the second aluminum post. We’re creating a symphony of holes here, folks! Keep up the good work!
Step 5: The Wall Dance
Now, let’s bring those posts to the wall and get our groove on! Place the post in its passionate position on the wall, making sure it’s level. Mark those post holes on the wall with all the finesse of a maestro. Time to whip out the hammer drill and drill the wall with the right bit for your anchors. Insert those concrete anchors like a boss. And if you need to channel your inner Thor with a hammer, go right ahead. We won’t judge!
Step 6: The Balancing Act
Put that post back on the wall and start screwing it in. But hold your horses, my friends! Don’t tighten it all the way just yet. Take a moment to check if your post is level again. And if it’s feeling a bit wonky, shimmy it with some shims. We’re all about that perfect balance, baby!
Step 7: The Slat Symphony
Now that our posts are rockin’ and rollin’, it’s time to move on to the slats. Measure from inside the channel to the other side inside the channel. It’s like measuring the width of a sandwich—except this sandwich is made of aluminum. Cut those slats to the right size, and make sure the top and bottom are equally delicious. We’re all about symmetry here, folks!
Step 8: The Slide and Glide
It’s time to slide those slats and spacers into place. It’s like putting together a jigsaw puzzle, but without the frustration. Slide, slide, slide, until your panel is complete. We’re almost there, my friends!
Step 9: The Secure Finale
We’re in the home stretch, folks! Once you’ve slid in your last slat, grab those stainless-steel L brackets and screw them on both sides of the fence panel. It’s like giving your panel a big, warm hug. Secure it tight, my friends! We don’t want any wobbly fences around here.
Step 10: The Glue-tastic Finish
We’ve reached the final step, my dear DIY darlings! Grab some silicone and let’s glue that aluminum post cup. It’s like giving your masterpiece a cherry on top. Make sure it’s secure and ready to withstand the elements. And just like that, you’ve installed your very own aluminum fence panels. Give yourselves a round of applause!
Overall, installing aluminum fence panels may seem like a daunting task, but with a little humor, a dash of creativity, and my trusty guide, you’ll breeze through it like a pro. So go forth, my DIY warriors, and conquer the world of aluminum fences! Remember, the only limit is your imagination. Until next time, stay fabulous, stay creative, and keep those fences standing tall. Catch you on the flip side, my aluminum-loving amigos!
Thank you for joining me on this aluminum adventure. Stay tuned for more exciting DIY escapades. And always remember, life is too short for boring fences!