Follow Rina to show you more information about aluminum profiles
Hey there, fellow weather warriors! Rina Meng here, ready to spill the beans on how to weather strip your windows and doors like a pro. Say goodbye to those pesky drafts and hello to a cozy, energy-efficient home. Trust me, this DIY project will have you feeling like a superhero in no time. So, grab your tools and let’s get weather stripping!
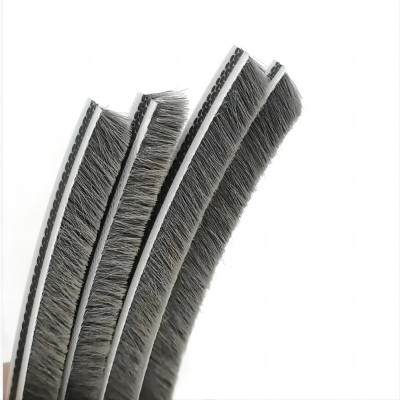
Choosing the Perfect Weather Stripping Sidekick
Before we dive into the nitty-gritty, let’s talk about choosing the right weather stripping for the job. You see, not all weather stripping is created equal. We have a whole squad of options to choose from, each with its own superpowers. From adhesive-backed foam tape to felt strips, EPDM rubber weatherseal tape, vinyl V strips, and door sweeps, the choices are endless. It’s like assembling your very own team of weather warriors!
Now, here’s the deal: when selecting weather stripping, make sure it’s suitable for its location. You don’t want your weather stripping to crumble under pressure, do you? It needs to withstand the wear and tear of opening and closing windows and doors, as well as the unpredictable whims of Mother Nature. So, choose wisely, my friends!
Step 1: Let the Inspection Begin!
Alright, let’s kick things off with a thorough inspection. Take a close look at your doors and windows for any gaps or holes that need sealing. We’re on a mission to keep those drafts out! If you spot any holes or cracks around the door frame, grab some outdoor-rated caulk and seal them up. Caulk is like the superhero glue that saves the day. Just load it into a caulking gun, cut off the end at an angle, and squeeze away. Fill those gaps like a pro!
Step 2: Clean and Prep for Action!
Now that we’ve sealed up the exterior gaps, it’s time to clean and prep the area where the weather stripping will work its magic. Grab a mild detergent, water, and a sponge, and give the area a good scrub. We want it squeaky clean, free from dirt and grease. Say goodbye to any remnants of old weather stripping and adhesive. It’s time for a fresh start!
Step 3: Let the Weather Stripping Show Begin!
Okay, folks, it’s time to bring out the big guns—the weather stripping! Let’s start with the trusty adhesive-backed foam tape. This stuff is a crowd favorite—affordable, easy to use, and effective. Measure the doorstop and both sides with a tape measure, cut the tape to the right length, peel off the backing, and press it against the doorstop. Voilà! Say hello to a draft-free zone.
But wait, there’s more! Don’t forget the door sweep. This little hero goes on the bottom of your exterior door, sealing the air gap between the door and the threshold. It’s like a shield against drafts. With the door closed, place the sweep on the bottom and make sure the rubber gasket seals tightly against the threshold. No light should be sneaking in from outside. Adjust it if needed, mark the holes, pre-drill, and fasten it with a screwdriver. You’re one step closer to victory!
Step 4: Let’s Give Those Windows Some Love Too!
Now, let’s turn our attention to the windows. They deserve some weather stripping TLC too! Start by inspecting the sashes for any gaps that need sealing. Clean the window sashes with mild detergent and water, making sure they’re squeaky clean. Remove any old weather stripping and adhesive with a glue-and-adhesive remover. We want a fresh canvas for our weather stripping masterpiece!
Next up, foam tape weather stripping. Measure the bottom of the lower sash and the top of the upper sash, cut the foam tape to fit, peel off the backing, and press it into place. When those sashes are closed, the foam tape will create an airtight barrier, keeping the outside air where it belongs—outside! But hey, if you want to take it up a notch, try vinyl “V” strips. These babies go between the sash stiles and the window channels, forming an airtight seal. It’s like a hug for your windows!
Step 5: Level up with Shrink Film Window Insulation!
If you really want to take your weather stripping game to the next level, consider using shrink film window insulation. It’s like giving your windows a cozy blanket for the winter. Clean the surfaces, apply the self-sticking two-sided tape around the window frame, cut off the excess film, and use a blow dryer to tighten it up. Say goodbye to those cold drafts and hello to energy savings!
Overall, my weather warriors, weather stripping your windows and doors is a game-changer. It keeps your home cozy, saves energy, and reduces those dreaded utility bills. So, gear up, choose the right weather stripping sidekicks, and embrace the power of a draft-free home!
Remember, you’ve got this! Now go out there and conquer those drafts like the weather warrior you are!